
Follow the instructions below to learn how to add new and manage existing O365 services.
1. Add a new O365 tenant -
Before completing this step, log in to Cloudmore and go to My Services. If the service Microsoft O365 is shown here, you may proceed to step 2.
If you wish to add Microsoft O365 Tenant, go to your e-store via the left-hand menu.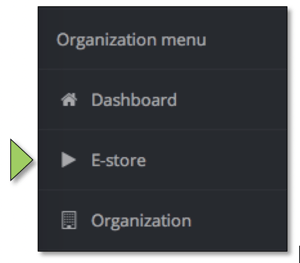
Find the O365 CSP Direct service.
Click add service.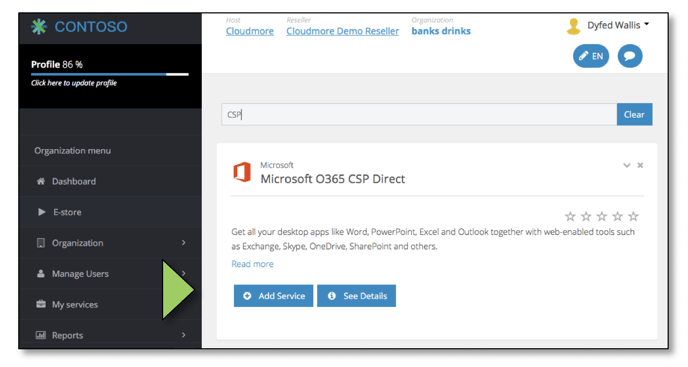
The form will pre-populate with details from your organization > properties.
Make sure your company address details are completed and correct. These are required by Microsoft when creating new tenants. A message will show if missing.
The contact details on the form will be used to create an admin user, and a confirmation email will be sent to this contact email address with O365 login credentials.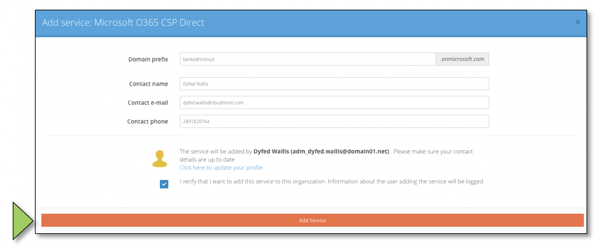
Check and update the details, and then click add service.
Cloudmore will then check the availability of the domain and confirm if it is available.

If the domain is not available, it already has a Microsoft tenant registered against it. If another supplier provides this, you will need to request a CSP relationship via the partner centre.
Click add service again.
The Microsoft tenant will now be created and shown immediately in the partner centre.
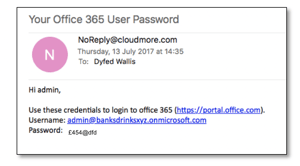
A confirmation email will be sent to the contact email address with O365 login credentials.
Note: -
No charges have been incurred at this stage.
The O365 Service will now show under My Services.
You will automatically be navigated to the Subscription Management page to add a new subscription.
2. Add a new subscription
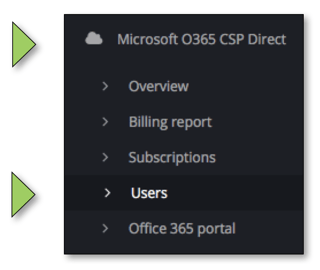
Go to the left-hand menu, and click on My Services > Microsoft O365 CSP Direct > subscriptions. 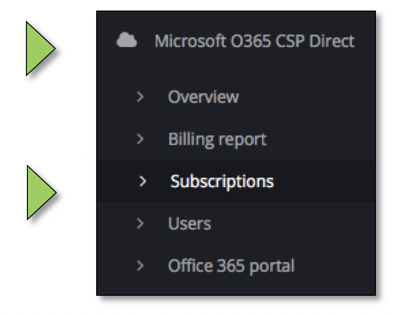
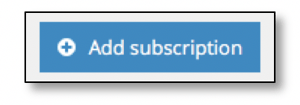
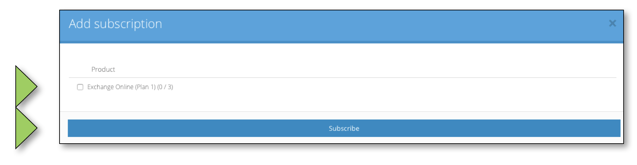
And then click add subscription.
The intelligent subscriptions selection screen will now display. 
Select the required product group.
Cloudmore will dynamically display the available products based on the product group selected.
Enter the number of seats you wish to create.
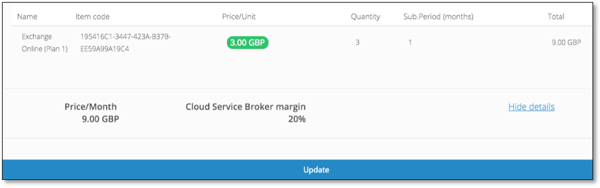
Cloudmore will calculate the price for the selected quantity.
The price used will be set and agreed upon by your cloud service broker.

Click on show details to see additional information, including item code, quantity, subscription period and total price.![]()

Click create the subscription.

- The subscription will be created, shown in the partner center, and available immediately.
Note: - - Costs will now be incurred based on the Microsoft billing rules.
- The new subscription will show in the subscription view for onward management.
- You will automatically be navigated to the Subscription Management page to manage existing subscriptions or add a new subscription.
3. Manage existing subscriptions
Go to the left-hand menu, and click on My Services > Microsoft O365 CSP Direct > subscriptions. 
Here you can see a list of existing subscriptions, the Product Name & SKU, the price, quantity purchase, quantity consumed/quantity available, subscription length, payment frequency, current status, start date, next invoice, and renewal date that the Microsoft price lock ends.
Use the actions drop-down menu to the right of each subscription you want to manage.

Manage Add ons (Legacy O365 Subscriptions Only)
Click Actions>Add Add-ons to manage to add ons.
Hover your cursor over the product name to see additional information.
Select the quantity required and click add.
The add-on will be available immediately.
Costs will now be incurred based on the Microsoft Billing rules.
Change Quantity
Enter the new total quantity required
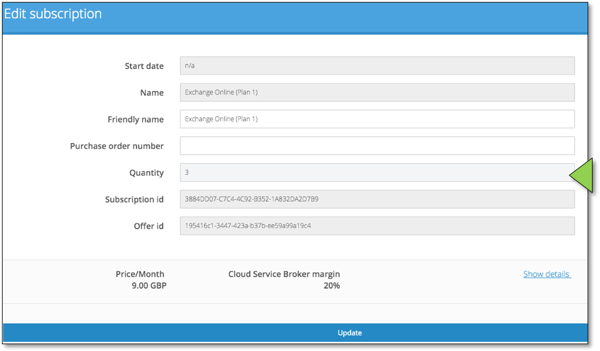
The new monthly cost will be automatically calculated.
Click update
The changes will be applied / available immediately.
Suspend a Subscription
For Legacy subscriptions, click Actions>Suspend option to cancel activity on the subscription immediately. For New Commerce Experience subscriptions, Suspend will suspend the service for the end-user, but the billing will continue.
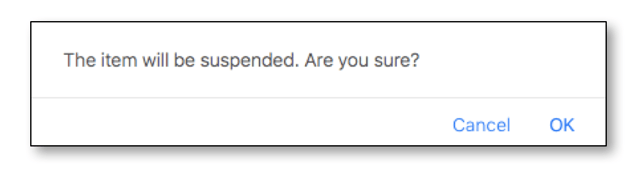
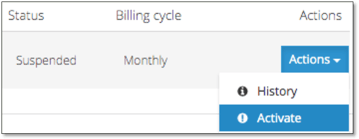
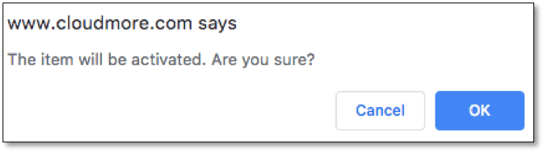
The status will change to suspended. To remove the subscription suspension, click on the Actions menu and activate.
Click OK, and the service will be immediately suspended.
4. Manage users
Users are bi-directionally synced in real-time with the Microsoft partner center. This means Cloudmore supports different business processes regardless if users need to be created in the Partner Centre directly or via 3rd party tools.
Go to My Services, O365, users from the left menu.
A list of existing 0365 users will be displayed.
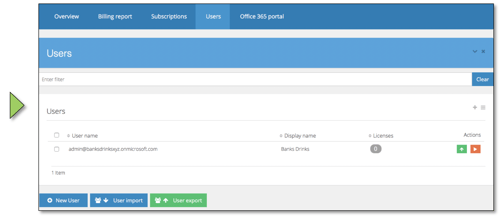
An admin user is created during the add new tenant process.
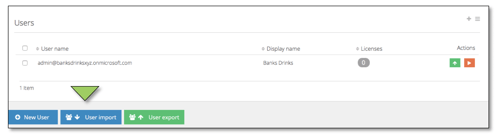
Add a New User
Click + new user
Complete the form
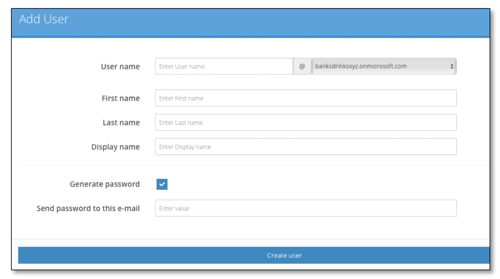
If you select Generate password, the office 365 login credentials will be emailed to the below address.
If you untick generate a password, you will be prompted to input a password.
Note: Minimum password length is eight (8) characters. Password must contain uppercase and lowercase characters, numbers and non-word characters. Password cannot contain parts of the user’s user name or parts of the user’s full name.
Click create user
The user will be available immediately and appear in the user's list for onward processing.
User import.
Users can be imported from the Cloudmore user directory.
Click user import
Enter the email address that the password should be sent.
Click import users
A password will be immediately emailed to the email address entered with the login credentials.
The users will be available immediately and will appear in the users list for onward processing.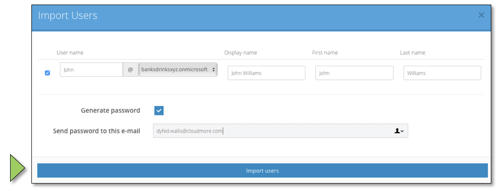
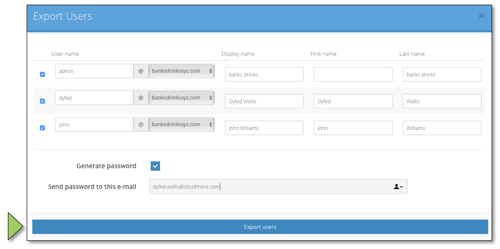
User Export.
Users can be exported to the Cloudmore directory.
Click user export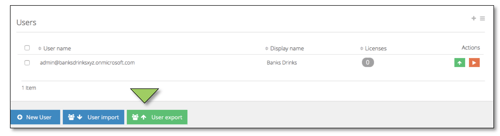
Enter the email address that the password should be sent.
Click user export
A (Cloudmore) password will be immediately emailed to the email address entered with the login credentials.
5. Subscribe/unsubscribe users to/from subscriptions
Go to My Services, 0365, users from the left menu.
Subscribe user(s) to a subscription.
To subscribe to an individual user, click on the Actions and then click Licences.

Select the subscription you wish to assign. If multiple subscriptions are available, they will display in the list.
Note: The quantity available and consumed will be displayed for each subscription.
Click subscribe
The user view will be updated to show the number of subscriptions subscribed to each user.
The subscription will be available to use the user immediately.
The consumed units will be updated to show the changes you have made.
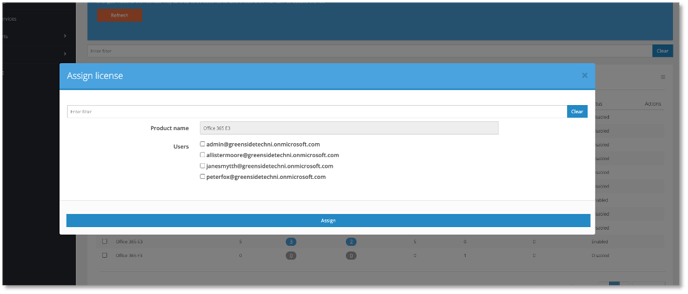
To subscribe to users in bulk, go to the “Licences” tab
![]()
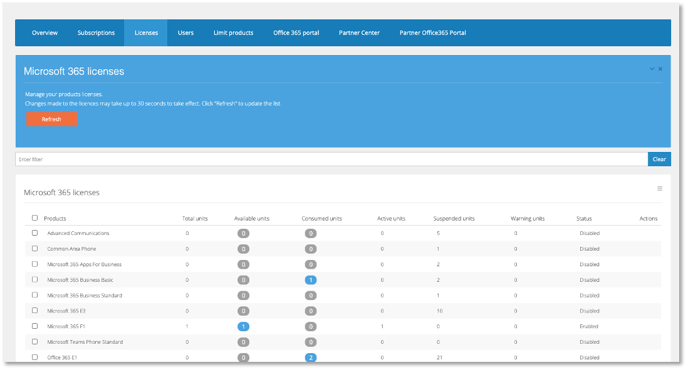 Click on the blue number under “Available Units”. Select the users and click “Assign.”
Unsubscribe a user from a subscription.
From the Licences view, click on the blue number in the “Consumed Units” column next to the licence you want to unsubscribe.

Select the users you wish to remove.
Click Unassign.
The subscription will be removed from the user immediately.
The consumed units will be updated to show the changes you have made.
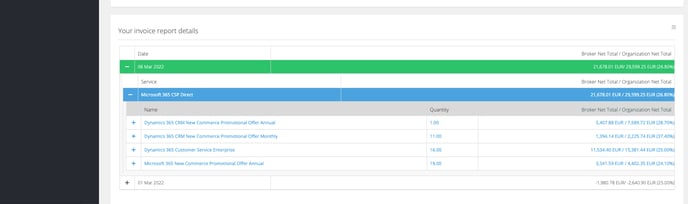
6. Billing report
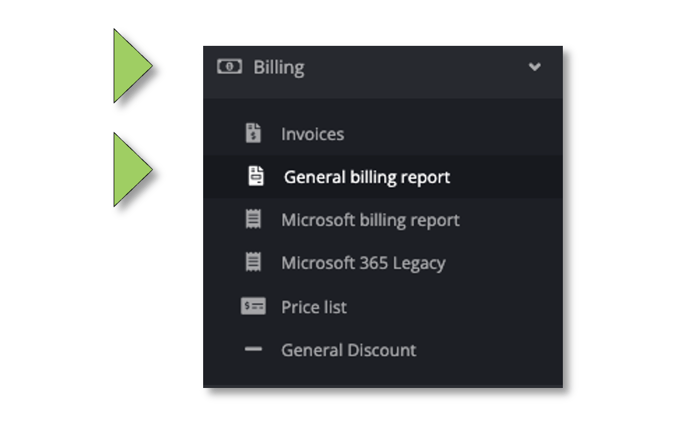
Go to Billing>General Billing Report from the left menu.
Select date range
Click on the date field and select the desired range. Last month will set the date range first day to the last day of the previous month. The custom range allows you to choose multiple months and will display a billing report for each month.
Select the Microsoft 365 CSP Direct service in the Available Services list to run a report on Legacy 365 and New Commerce Experience subscriptions. Click “Run Report”.
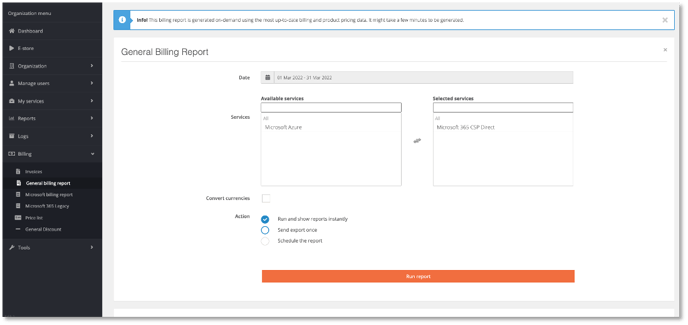
The report will display.
The service “Microsoft 365 CSP Direct” is a New Commerce Experience. The service “Microsoft 365 CSP Direct Legacy” are Legacy O365 subscription.
 Export
Export the report to see more details by clicking on the ![]() icon above the report to the right.
icon above the report to the right.
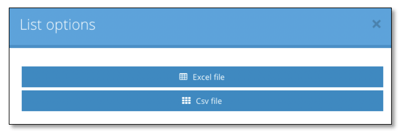
The file will download automatically.
Find out more about our CSP Integration and Automation.
END