Many users will run the same report every month for billing. To make it easier the user can set up a scheduled report where they choose how often this report should run and who can receive it.
We also added an option to run the report and have it emailed. This is to increase the user-friendliness for reports with thousands of records that may take time to generate.
1. Scheduling the Billing Report
Access the Billing Report by following Organization menu > Billing > Billing Reports
Complete the on-screen Billing parameter and the user is then presented with three Actions, one of these should be chosen

- Run and show reports instantly: This will produce an on-screen version of the report which can be download to an Excel or CSV file by clicking the icon =
- Run and email report: This will send a copy immediately of the Excel download to email addresses specified by the user when chosen and Get Report is clicked
- Schedule Report: This will send a copy of the Excel download to a predefined list of users at specified days and times from a named template created for the Billing Report
2. Create the Schedule
Create the Billing Report Parameter and press the Schedule Report button
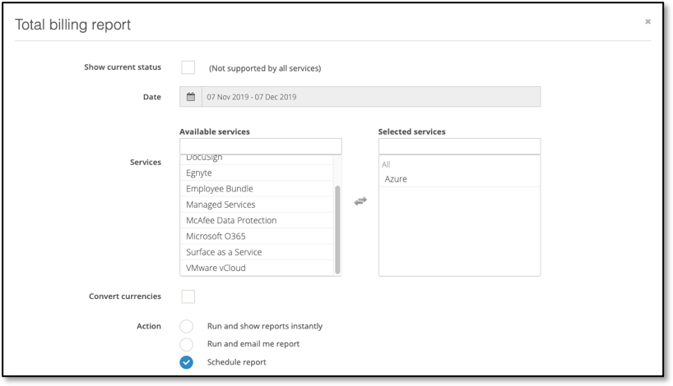
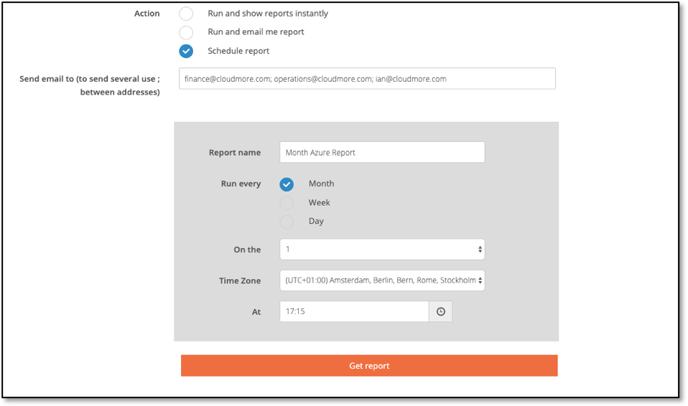
Additional actions will be presented that require completion
- Send email to: One of multiple emails can be entered to send an Excel version of the Billing Report. Multiple addresses are separated by a semicolon
- Report Name: Defined name for the report which will be presented in the email notification message
- Run Every: The day or date that the report will be run and sent to the email recipients
- Month: 1 to 31 or Last Day of Month are presented in the drop-down menu in the option ‘On the ‘
- Weekly: Days of the week are presented in the drop-down menu in the option ‘On the’
- Day: No drop-down presented as the report is run on a daily basis
- Time Zone: Choose one from a list of world time zones for the report to be run on
- At: Choose a time by clicking the clock icon and choosing from the presented lists of Hourly and 15-minute segments for the report to be run on


Press Get Report to save the Scheduled Report
3. Scheduling the CSP 365 Billing Report
Access the Billing Report by Organization menu > Billing > Microsoft CSP Billing and click the Schedule button

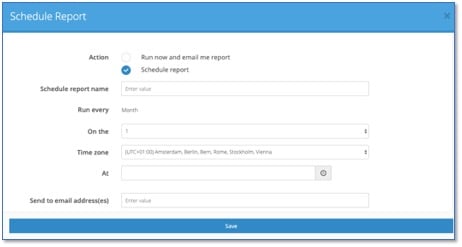
The user will be presented with the scheduled report parameter option
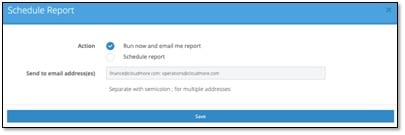
- Run now and email me report: This will send a copy immediately of the Excel download to email addresses specified by the user when chosen and Save is clicked
- Schedule Report: This will send a copy of the Excel download to a predefined list of users at specified days and times from a named template created for the Billing Report
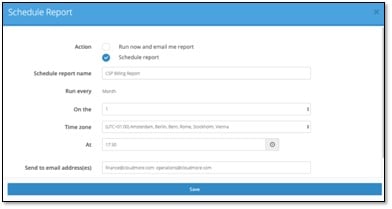
Additional actions will be presented that require completion
- Schedule report name: Defined name for the report which will be presented in the email notification message
- Run Every: The CSP report is only available on a monthly report
- On the: 1 to 31 or Last Day of Month are presented in the drop-down menu
- Time Zone: Choose one from a list of world time zones for the report to be run on
- At: Choose a time by clicking the clock icon and choosing from the presented lists of Hourly and 15-minute segments for the report to be run on
- Send to email addresses: One of multiple emails can be entered to send an Excel version of the Billing Report. Multiple addresses are separated by a semicolon
- Press Save to store template for the scheduled billing
4. Delete a Scheduled Billing Template
Access the Billing Report Templates by Organization menu > Reports > Scheduled reports
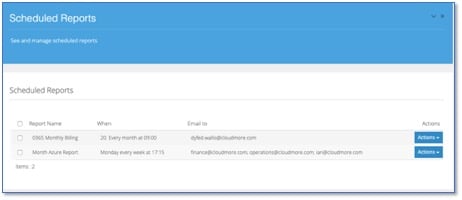
Press the Actions button and Delete to remove a single report template
Press tick boxes to the left of the screen and then click delete to remove multiple report templates
