
Customers using a branded URL to access Cloudmore can set up Single Sign On (SSO) to centralise the login activity for their broker and organization admin accounts. Follow the steps below to set up SSO using the Microsoft Azure AD account.
- Pre Requisites
- Configure SSO in Cloudmore
- Create Enterprise application in the Azure AD portal and assign users
- Configure SAML SSO in Azure portal
- Set up Attributes and Claims
- Download metadata file from Azure and map it in Cloudmore
- Verify the SSO Configuration
1. Prerequisites
To get started, you need the following items:
- An Azure AD subscription
- An account in Azure that allows you to create Azure Enterprise Applications
2. Configure SSO in Cloudmore
- Login to Cloudmore and navigate to the broker or organization that you want to enable SSO for.
IMPORTANT! If your users will be login to Cloudmore via a branded URL you need to use that URL when setting up SSO. - Make sure that all users that should use SSO have a Cloudmore account. As they are using SSO, the passwords of the accounts do not matter.
- Go to Organization > Security center and select the Enable SSO checkbox.
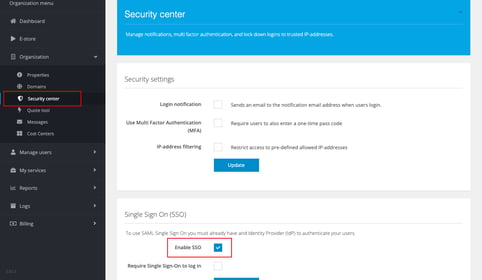
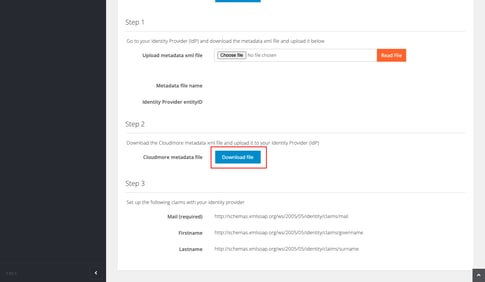
- Under Step 2, click Download file to download the Cloudmore metadata file. This will be used in the Azure portal later (see below) to complete the SSO configuration.
3. Create Enterprise application in the Azure AD portal and assign users
- Login to the Azure portal.
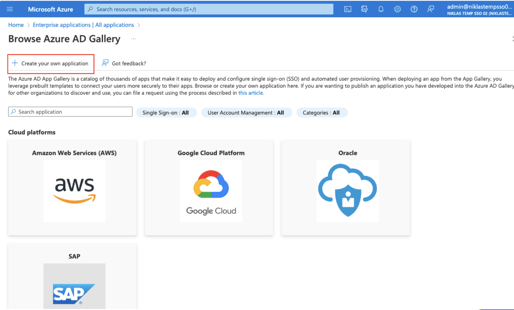
- Search for "Enterprise applications" in the top search bar and click on it as it appears in the search results.
- Click New application.

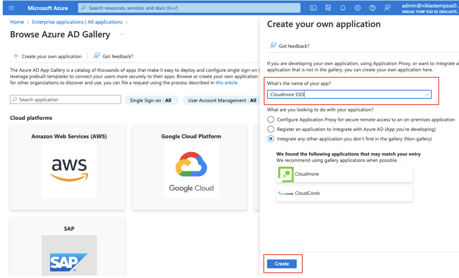
- Click Create your own application.
- Enter a name for the Enterprise Application and click Create.
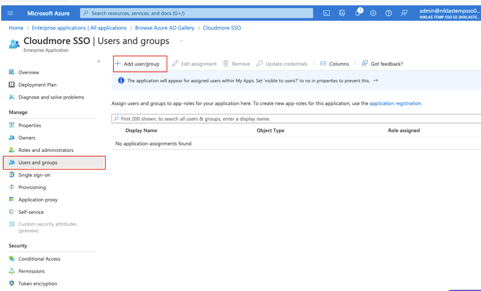
- Click Users and Groups on the left bar and then click Add user/group.
- In the Add Assignment screen, click None selected under Users.
-
Search and select a user or a group. Then click Select.
NOTE! You need to add all users or a group containing all users that should be allowed to login with SSO.
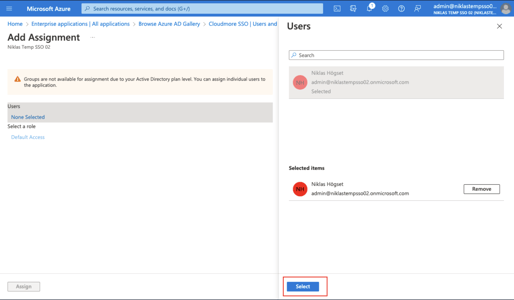
- Click Assign on the bottom left.
4. Configure SAML SSO in Azure portal
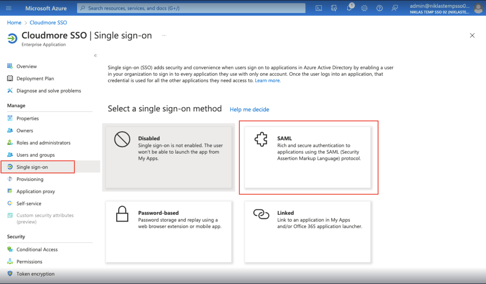
- In the Azure portal, click Single sign-on and then on SAML.
- Click Upload metadata file. Click the folder to locate the XML file downloaded from Cloudmore in step 4 and then click Add. (refer to the gif below)
.gif?width=688&height=387&name=sso%20(2).gif)
- Click Save and then close the Basic SAML Configuration window. If you're prompted to test the SSO configuration, click No, I'll test it later.
5. Set up Attributes and Claims
- Click the Edit icon in the Attributes & Claims section. Click Add new claim.
.gif?width=688&height=387&name=sso%20(3).gif)
-
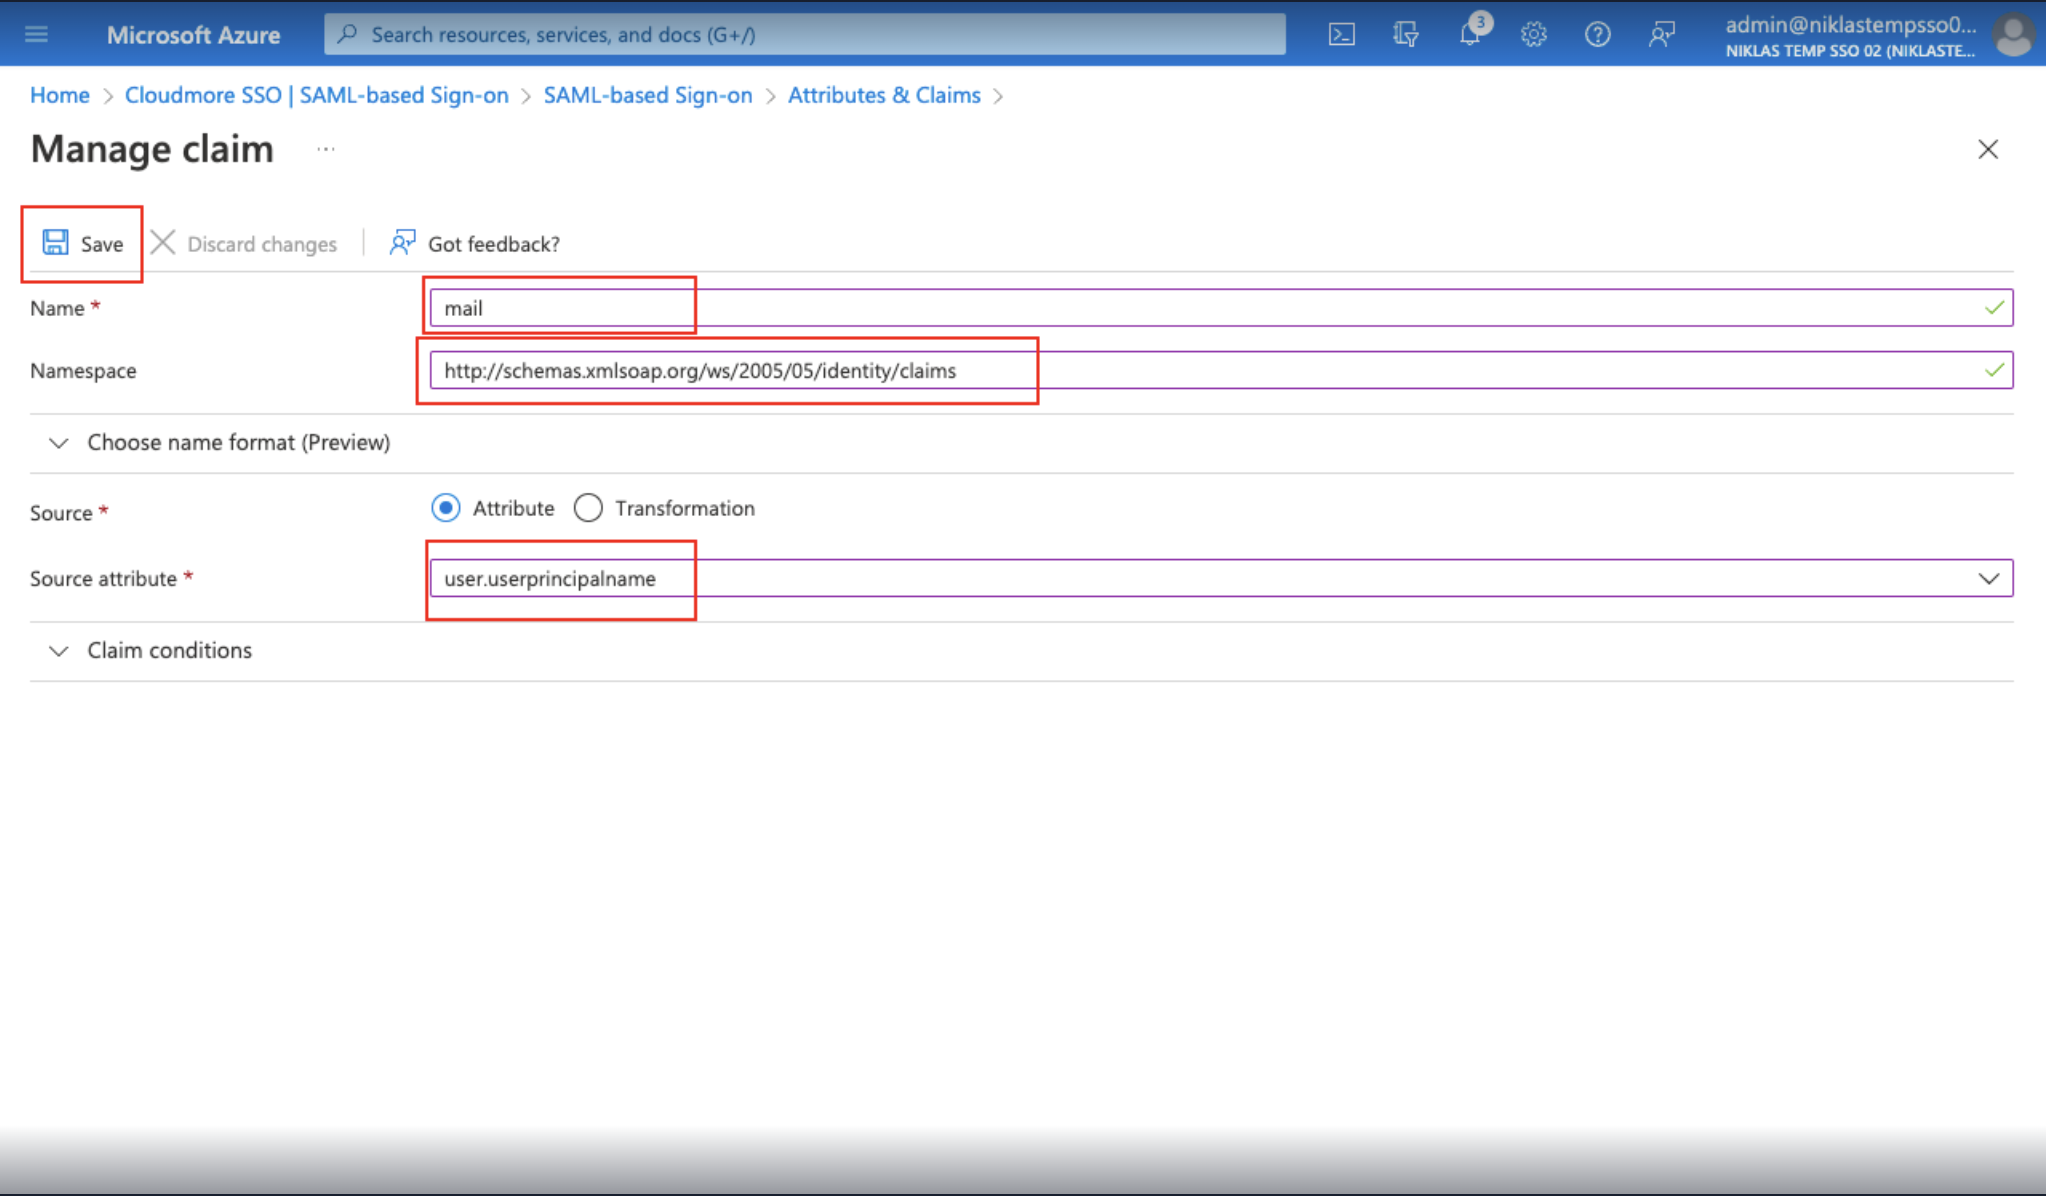
In the Manage claim page, enter the following details:
-
Enter "mail" in the Name field.
-
Enter “http://schemas.xmlsoap.org/ws/2005/05/identity/claims” in the Namespace field.
-
Select Attribute under Source.
-
Enter “user.userprinciplename” under Source attribute.
-
Click Save.
-
Close the Manage claim window.
-
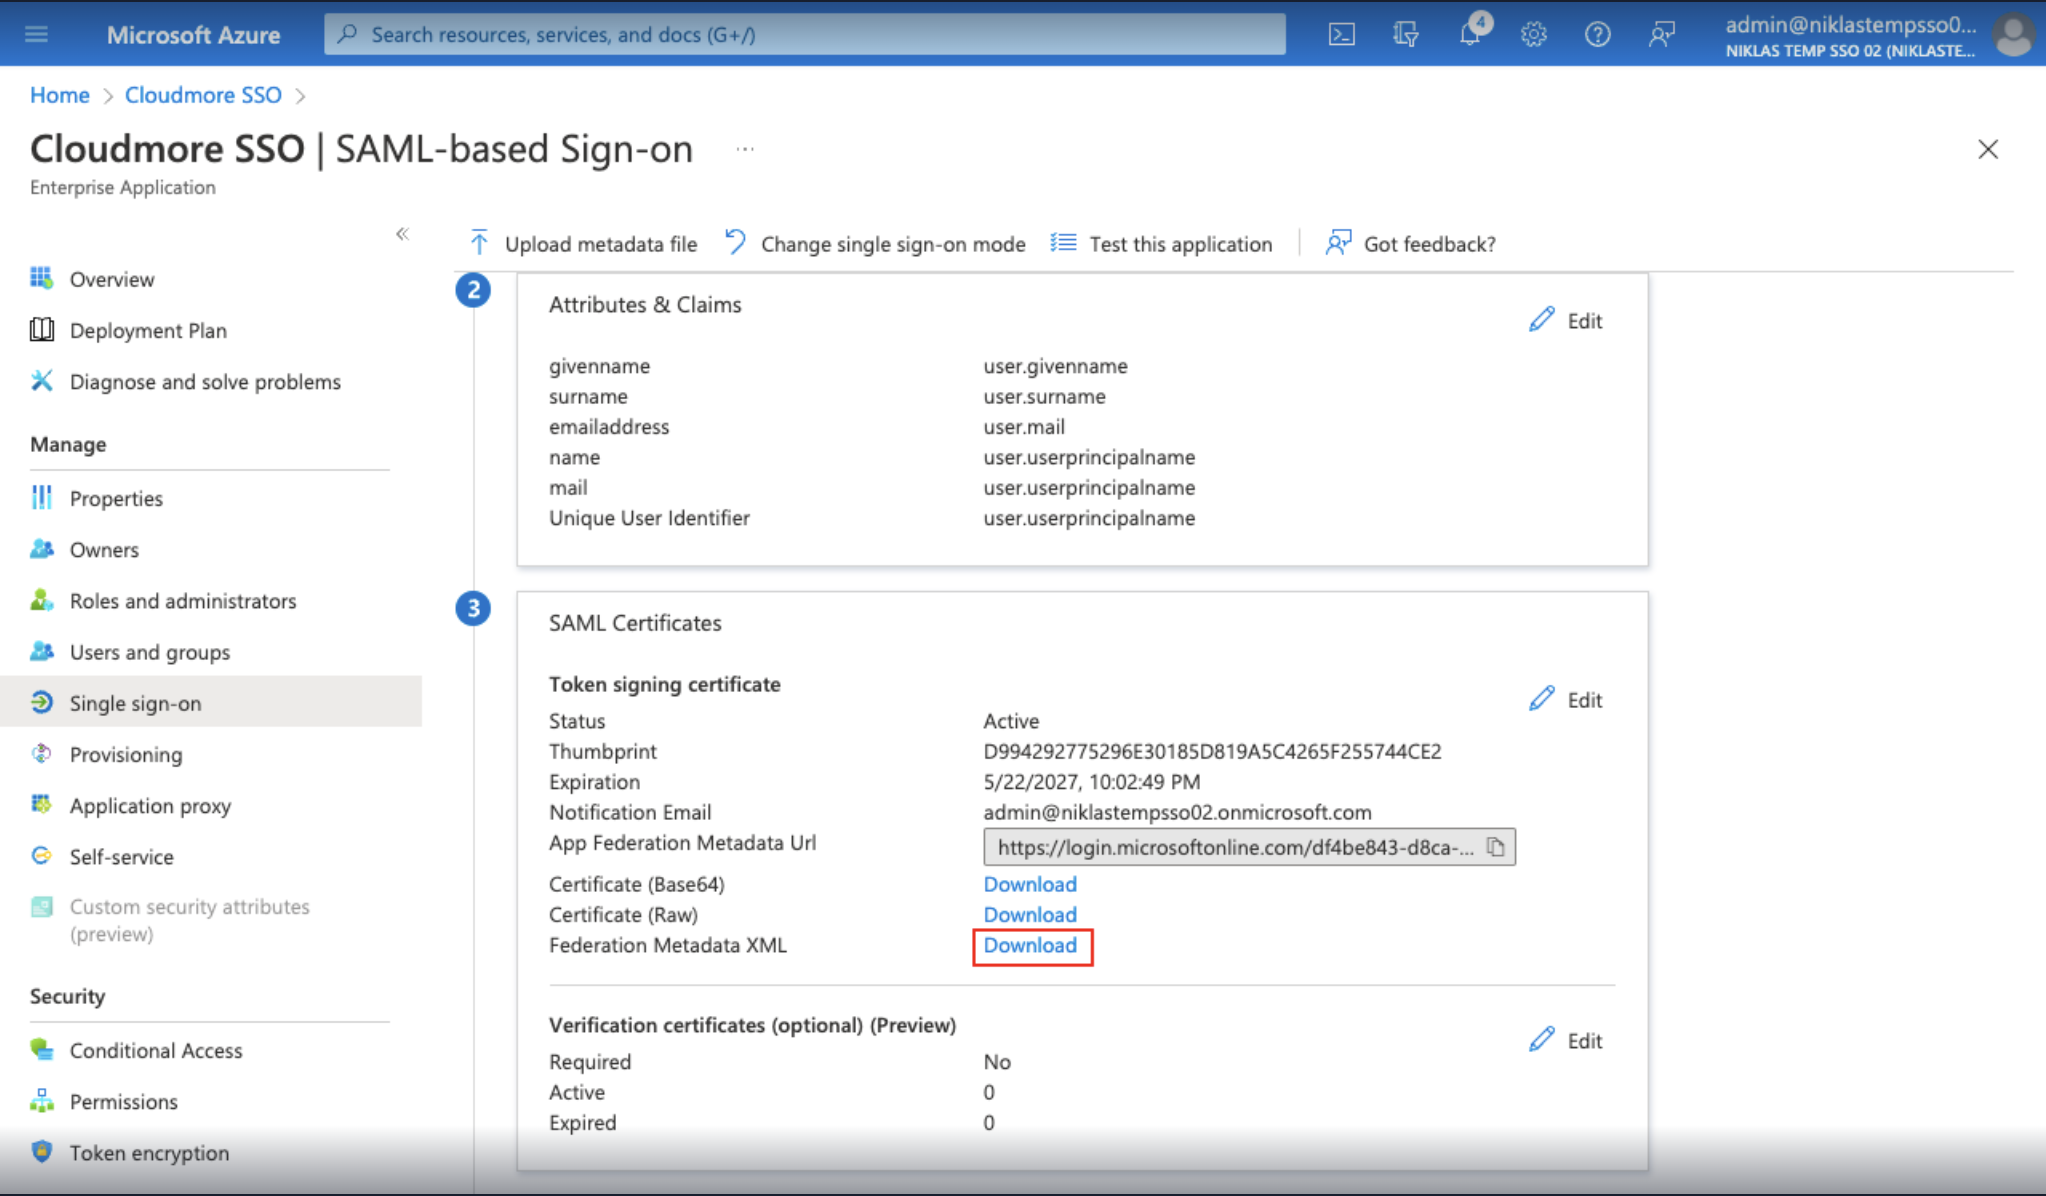
6.Download metadata file from Azure and map it in Cloudmore
- In the SAML Certificates section click Download Federation Metadata XML.
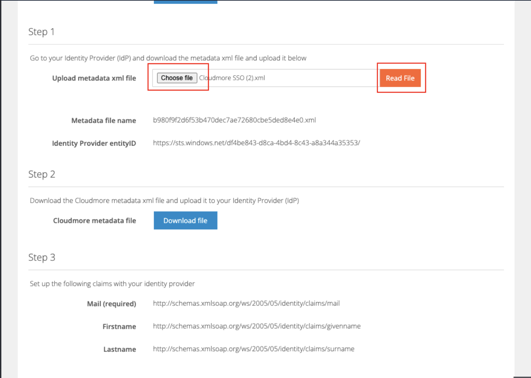
- Navigate back to the SSO section in Cloudmore.
-
Click Choose File and select the XML file downloaded from step 1.
-
Click Read File.
-
Click the Update button above to save the changes.
7. Verify the SSO Configuration
- Go to your Cloudmore login page, if you are using branding you need to use the branded URL.
- Click Single Sign On (SSO).
.gif?width=688&height=387&name=sso%20(4).gif)
-1.gif?width=688&height=387&name=sso%20(3)-1.gif)
-
Enter a username that you want to try the SSO with. Click Submit.
- Enter your username for Microsoft and click Next.
- Enter your password and click Sign in.
- You will be successfully signed into Cloudmore