
Follow the instructions below to learn how to add new and manage existing Azure Subscriptions.
1. Add Azure service
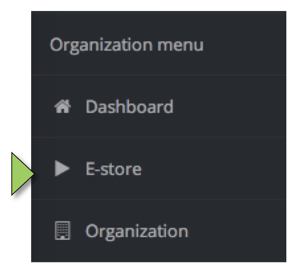
Go to your e-store via the left-hand menu.
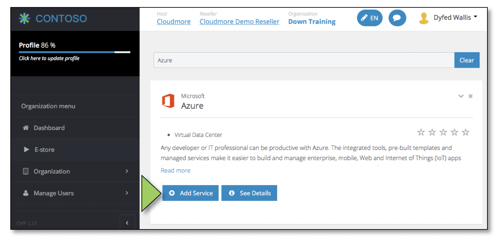
Find the Azure service.
Click add service.
Verify that you want to add the service, and click add service.
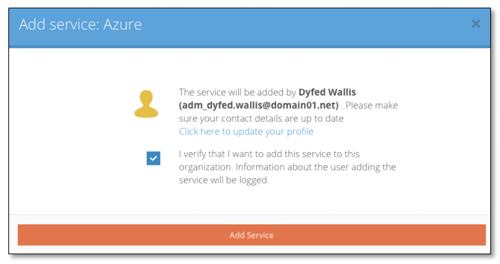
No charges are incurred at this stage.
The service will be created, shown in the Azure portal, and will be available immediately.
2. Add subscription
Note: A Subscription is a billing container for deployed Microsoft Azure services.
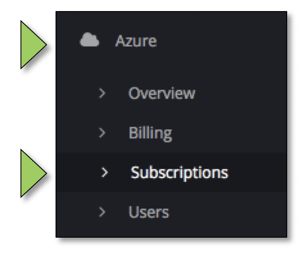
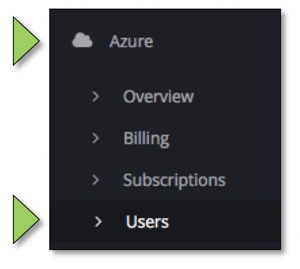
Go to My Services, Azure, subscriptions from the left menu.
And then click add subscription.

Complete the form
Name: - Name of subscription (billing container) – billing reports are grouped by this name.
Assign to user:- Allocate contributor rights.
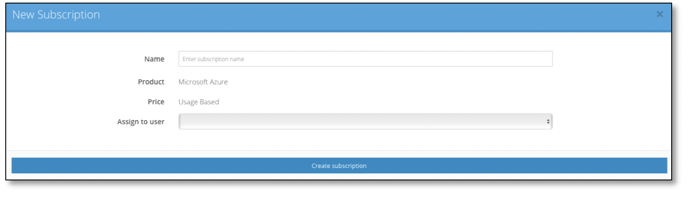
Click create subscription.
The subscription will now show in the subscription list.
You can edit this by clicking on the Actions drop-down menu and clicking Edit

3. Add users and assign subscription
Go to Manage Organizations>Organizations and click on the name of the Organisation you wish to manage.
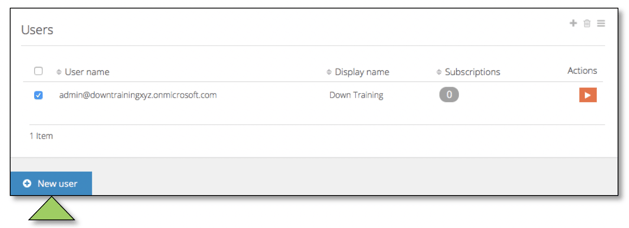
Go to My Services, Azure, and Users from the left-hand menu.
One user will automatically be created (this is the admin created when adding the tenant)
If the tenant has existing users in the partner centre, they will be displayed here.
To add a new user, click new user.
Complete the form.
If you tick generate an automatic password, enter the email address you want this sent to.
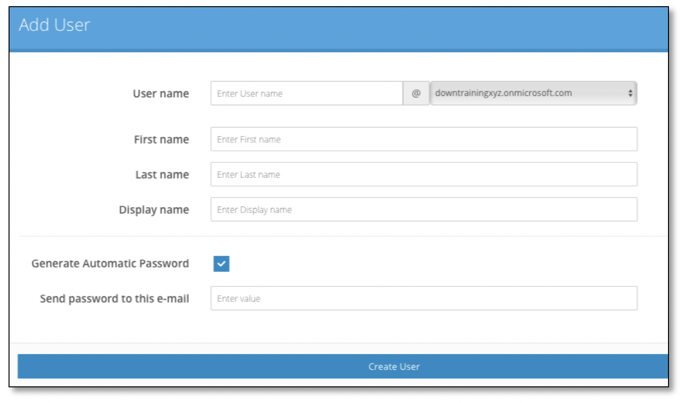
If you untick generate an automatic password, enter the password for this user.

Click create user.
The new user will now be displayed in the list.

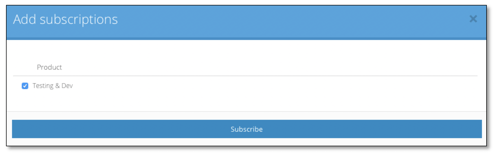
To subscribe to an individual user, click on the Actions and then click Subscriptions.

Tick the subscription (s) you wish to assign and click subscribe. If multiple subscriptions are available, they will display in the list.
The user Is now assigned contributor rights to the subscription and can now log in to the Azure portal to create/start/stop new Azure services under the assigned subscription.
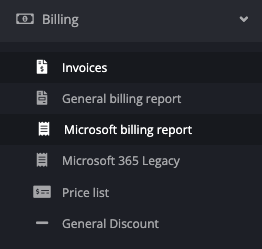
4. Billing report
Go to Billing, Microsoft Billing Report, from the left-hand menu.
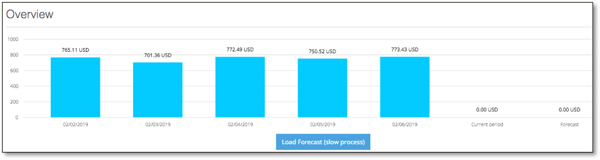
The chart displayed at the top of the page summarises the total billing costs for the last five months.
You will see a list of all available invoices. Select one or more invoices, then click Actions>View Details to retrieve the data. You can also select Download from the Actions menu to download a .csv/Excel file of the data.
4.1 Report Details
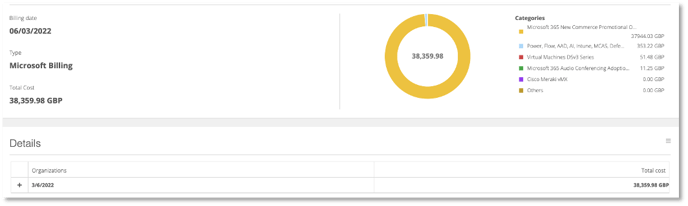
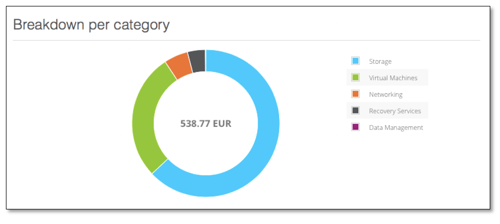
Breakdown per category
For all reports, Cloudmore will display a breakdown by category.
Note:- The categories are pre-defined by Microsoft.
View detail
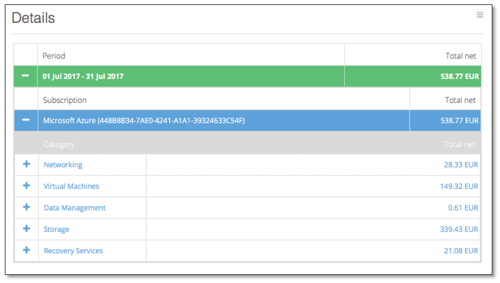
The billing report will be grouped by: -
- Date - One billing report per billing cycle within the selected date range will be displayed. This will show the total invoice amount. Click on date to expand. If you tick custom period, one consolidated report will display
- Subscription - The report is automatically grouped per subscription and shows the invoice amount. Click on subscription to expand.
- Category - The report is automatically grouped per category
Export
Export the report to see a more detailed breakdown by clicking on the ![]() icon above the report to the right.
icon above the report to the right.
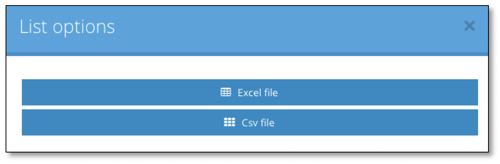
The file will download automatically.
5. Azure Usage report
Follow the instructions below to learn how to run the Azure usage report.
|
Note: - The Azure usage report lets you see Azure consumption and cost details for completed billing periods and the current, un-billed period. This helps you understand the detailed breakdown of Azure costs, what resources have incurred costs and allows onward charging to specific projects and cost centres. Cloudmore generates a powerful export that enables you to see the quantity of each resource consumed, the rate, the resource name, resource group and any resource tags added. Important Notes The usage report combines data from 3 different Microsoft APIs. Due to Microsoft restrictions with the available data, the usage report may not match 100% with the invoice report. |
1. Go to My Services
Select Azure > Azure usage report
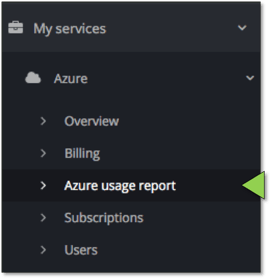
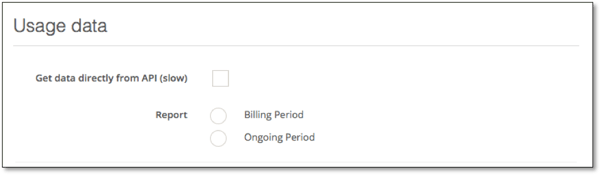
2. Select Azure usage report
Select Billing Period or Ongoing Period
3. Select the period
Invoice dates group usage Data automatically. Click on the billing period you want and then Actions>Schedule
Enter your email address to receive the report within a few minutes via email
This robust data set will enable you to manipulate the data as required. Data can be sorted and grouped by subscription, TAGS, resource name and resource group. Enabling costs to be monitored and allocated as required.
Learn more about managing Azure services in Cloudmore.
END