Create the products you want to sell as part of a service in Cloudmore
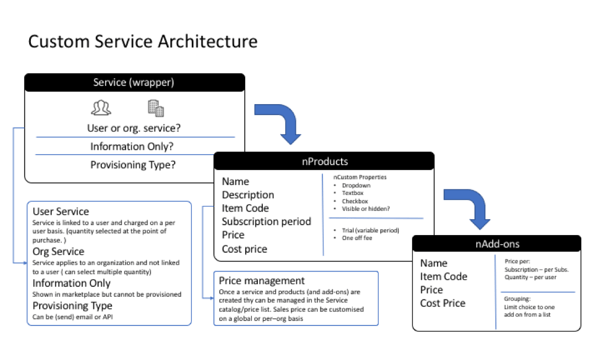
Products are created under the Custom Service wrapper. The product is the subscription, physical product, or professional service that the end customer buys. Add-ons can be attached to a product.
The diagram below shows the Custom Service Architecture hierarchy:

1. Go to Services
To set up a product, log in to Cloudmore. Navigate to your Broker menu > Broker > Custom services. To create a product, you must first create a Service.
2. Go to Products
Click on the Actions button and then click on the Products icon
.png?width=688&name=Custom%20Service%20Products%201%20(5).png)
3. Create a new product
Click Create to add a new product.
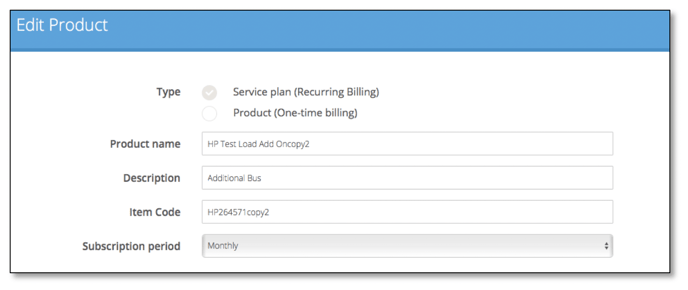
4. Enter the product details
Type: Service Plan (Recurring Billing), for example, charged monthly or annually or Product (One-time billing), for example, hardware or professional services.
Product name: Enter a simple, self-explanatory description of the product.
Description: Enter a longer description of the product that will help the end-user understand this product option.
Item code: Enter an item code that will be used as a unique identifier for this product.
Type: Product Based or Metered. Select Metered for a consumption-based service. For more on setting up Consumption-Based Services, see here.
Subscription period: Set the required subscription period to monthly or 12, 24, 36, 48, 60 months.
Price
Note: Cloudmore supports multi-currencies – your account default currency will be used when setting up new products; pricing in other currencies can be added once the initial set-up is completed.
Price: Enter the recommended sales price. Admins can customize this if required.
Cost Price: Enter the Reseller buy price.
Minimum & Maximum Quantities: Set Minimum & Maximum Quantities available here.
Product List Priority: This will set the placement position of the product in the Service's product list
5. Set renewal and cancellation actions
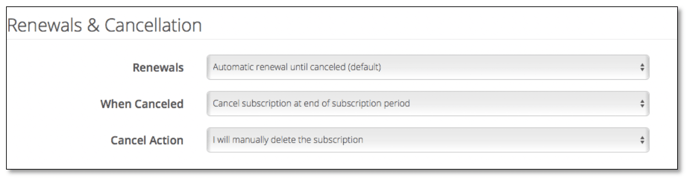
Renewal Action - Using the drop-down box, set what you want to happen when a subscription is due for renewal
|
Automatic renewal until cancelled (default). |
The subscription will be automatically renewed unless cancelled during the subscription period. |
|
Automatic cancel at subscription period end. |
The subscription will end automatically on the renewal date. |
|
Change product. |
You can select a different product subscription to begin when the current subscription has reached the renewal date. |
Cancel Action – Using the drop-down box set how you want to delete a subscription once it has been cancelled
|
I will manually delete the subscription. |
The administrator will delete the subscription. |
|
Delete at the end of the subscription period. |
The subscription will automatically end on the set expiry date. |
|
Delete Subscription immediately. |
Selecting this option will cancel the subscription immediately. |
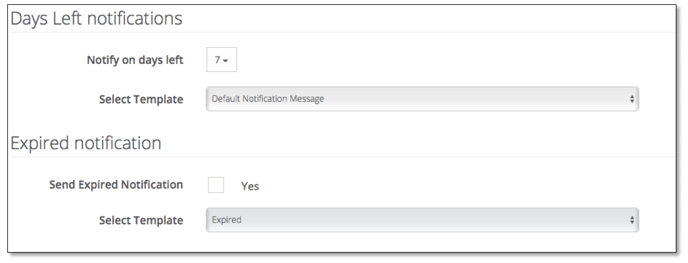
6. Set renewal notifications
Notify on days left: Use the drop-down box to set when an email notification is sent regarding the subscription renewal. Multiple triggers can be selected; notifications can be sent 90, 60, 30, 14, and 3 days before expiry and the day before and on the actual expiry date.
Select Template: Attach a renewal notification email template that you have created and saved in Cloudmore. Click here to learn how to create email templates.
Send Expired Notification: Check the box to send a notification email when the subscription has expired.
7. Set Welcome Message
The organisation adds subscription: Select to send the welcome message when an organisation adds the subscription
Select Template: Attach a welcome email template that you have created and saved in Cloudmore. Click here to learn how to create email templates.
.png?width=688&name=Custom%20Service%20Products%203%20(2).png)
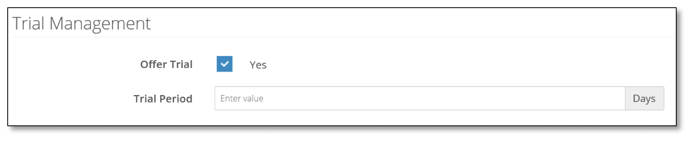
8. Add a trial period
Tick Offer Trial if you allow a free period before invoicing. Set the number of days without charge.
9. Enter the provisioning e-mail
Enter the e-mail address that will receive provisioning information for this product.

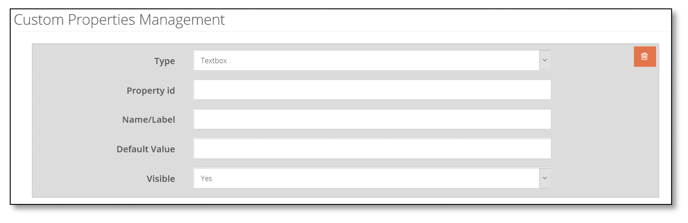
10. Add Custom Properties
Custom properties enable a flexible way to gather additional information at the point of purchase. You can add multiple fields each in the appropriate formats such as text, drop-down, or checkboxes.
Click Add Custom Property.

Select Type of field, Textbox, Dropdown, or Checkbox.
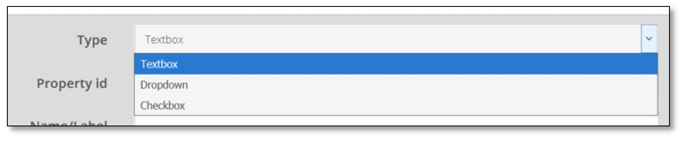
Textbox
Property id: Enter the internal identifier - do not use characters, numbers, or spaces.
Name/Label: Enter the field description.
Default Value: Enter text to either guide the buyer about the format you want them to enter or a regularly used response that can be changed if required.
Visible: Select if the Custom property should be visible or not in the procurement process. Field marked not visible will be included on the provisioning notifications.
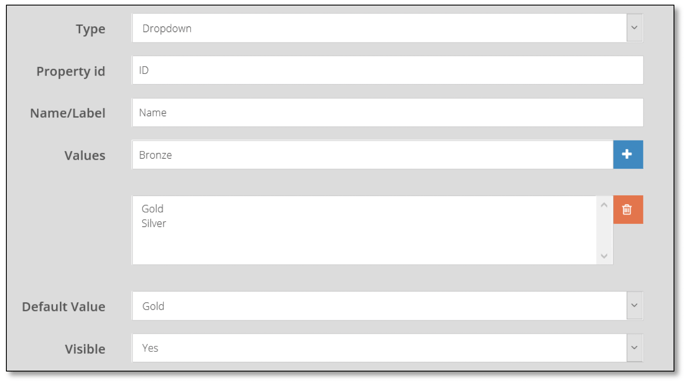
Dropdown
Property id: Enter the internal identifier - do not use characters, numbers, or spaces.
Name/Label: Enter the field description.
Value: Enter the drop-down options by entering a value and then the blue add button.
Default Value: Enter text to either guide the buyer about the format you want them to enter or a regularly used response that can be changed if required.
Visible: Select if the Custom property should be visible or not in the procurement process. Field marked not visible will be included on the provisioning notifications.
Checkbox
Property id: Enter the internal identifier - do not use characters, numbers, or spaces.
Name/Label: Enter the check box description.
Default Value: Set if you want the box ticked or unticked by default.
Visible: Select if the Custom property should be visible or not in the procurement process. Field marked not visible will be included on the provisioning notifications.
Click Create when you are done.
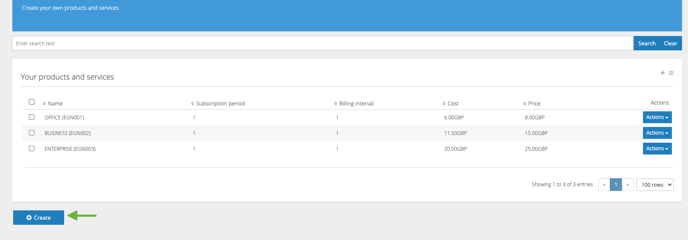
The product will now show in the product list.
.png?width=688&name=Custom%20Service%20Products%204%20(8).png)
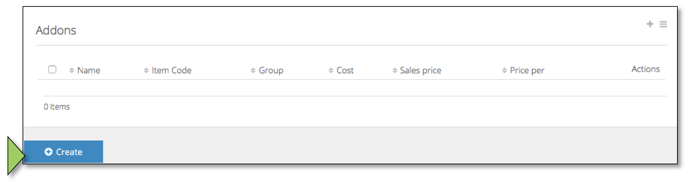
11. Add On’s
Click on the Action button next to the product, then click Add-ons to manage add-ons.
Then click on the create button to add a new add-on.
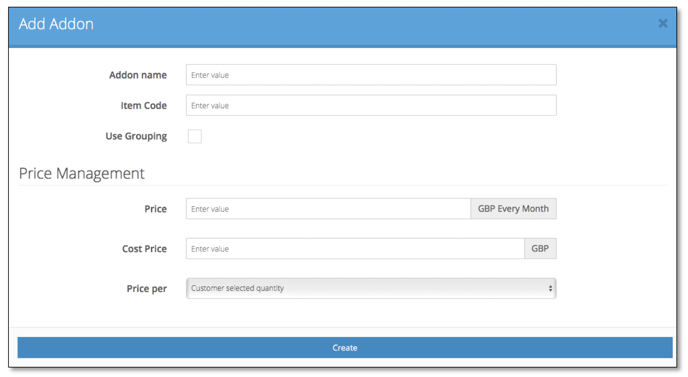
Addon name: Enter the name of the add-on.
Item code: Enter an item code that will be used as the unique identifier for this add-on.
Use Grouping: Tick grouping to allow only 1 add-on from each group to be selected.
Price: - Enter the sales price.
Cost price: - Enter the cost price for the add-on.
Price per: -
Subscription - If a subscription is selected, then pricing added will be used.
Quantity - If the quantity is selected, then the add-on pricing will be multiplied by the product quantity that has been added.
Customer selected quantity – If the customer selected quantity is selected, then the add-on pricing will be multiplied by the quantity the customer has added.
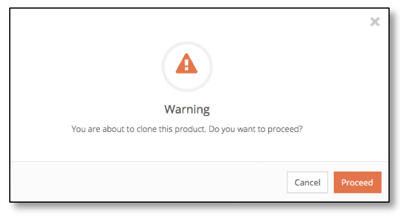
12. Clone Products
Cloning products enables you to add different product options by replicating an existing product quickly. This will copy everything, including custom fields and add-ons. After your 1st product is set up, all you need to do is clone it and make a few changes.
Click on the Action icon next to the product and select "Clone" to clone it.

A warning message will be displayed; click proceed to continue.
The product will now show in the product list with the name appended with "copy".
Click on the Actions icon, then select Properties to edit.
Then make the required changes.